Flutter で画面遷移を行う
Flutter で 画面の遷移を行うには、Navigator クラスを使用します。
MaterialApp であらかじめルーティング情報を定義しておく方法と、都度設定する方法の2つがあります。
あらかじめルーティング情報を定義しておく
MaterialApp ウィジェットを生成する際に、routes パラメータでルーティング情報を定義できます。たとえばページ1と2があって、この間を遷移するルーティング情報を定義するには以下のようにします。
MaterialApp(
    theme: ThemeData(primarySwatch: Colors.blue),
    home: MyPage1(),
    routes: <String, WidgetBuilder> {
        '/my-page-1': (BuildContext context) => new MyPage1(),
        '/my-page-2': (BuildContext context) => new MyPage2(),
    },
);
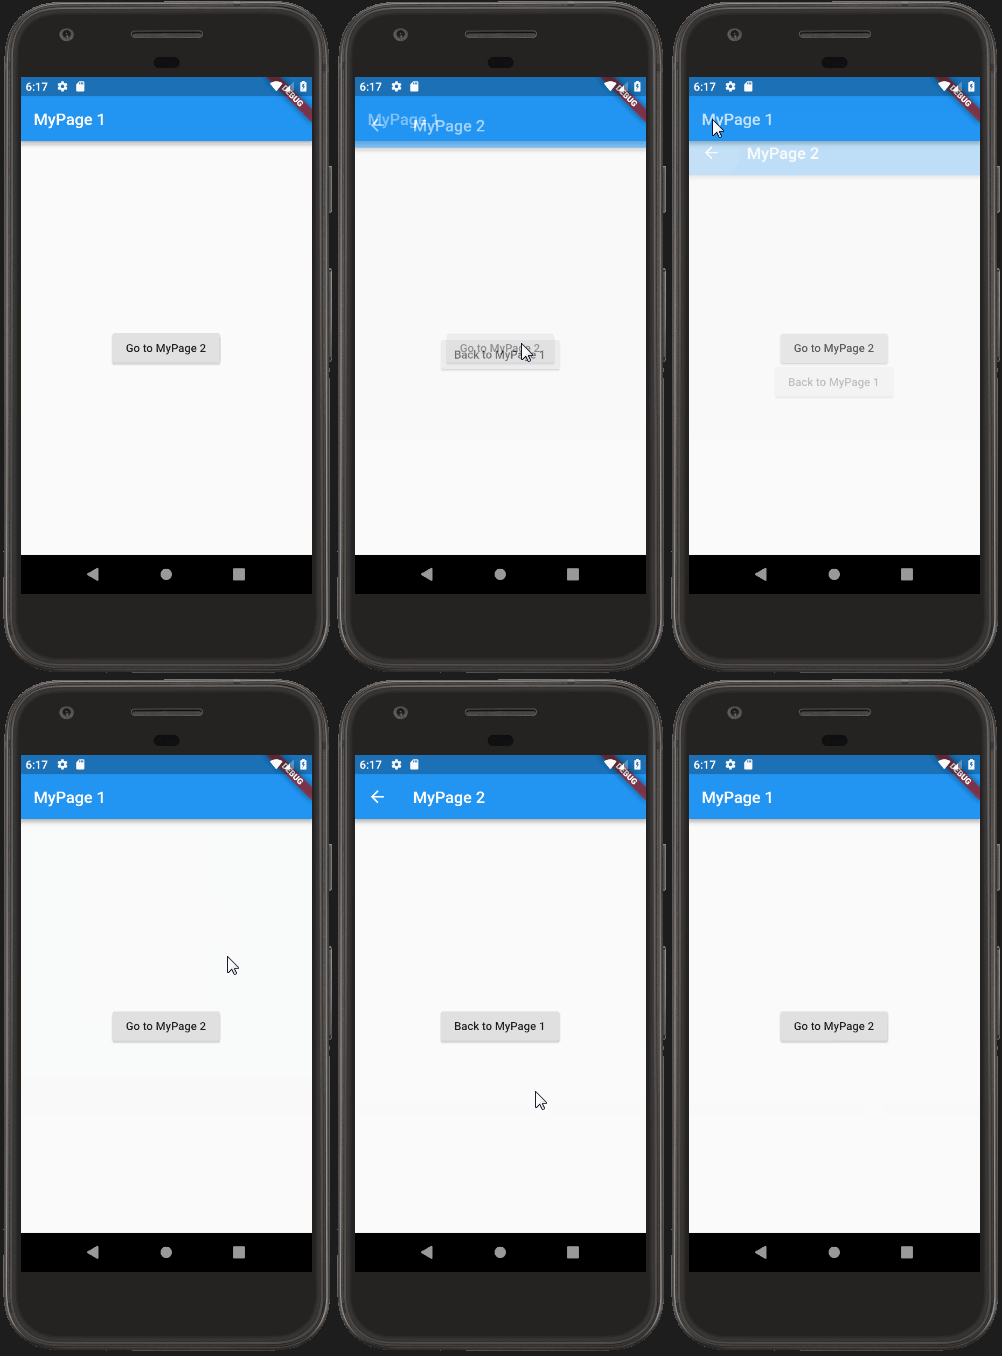
遷移するには Navigator.pushNamed() でコンテキストと、定義したルート名を指定します。すると、いい感じにナビゲーションしてくれます。
Navigator.pushNamed(context, '/my-page-2');
正しく遷移できていると、AppBar に戻るボタンが表示されているはずです。
コード上からは、Navigator.pop() で表示中のページから直前の画面に戻ることができます。
Navigator.pop(context);
以下、全コードです。ページ1と2を遷移するだけの単純なコードです。ポイントは、ページに対応する Widget を Scaffold から構築する点です。
MaterialApp をルートにすると、別扱いで戻るボタンが表示されないので気を付けましょう。
import 'package:flutter/material.dart';

void main() => runApp(MyApp());

class MyApp extends StatelessWidget {
  @override
  Widget build(BuildContext context) {
    return MaterialApp(
      theme: ThemeData(primarySwatch: Colors.blue),
      home: MyPage1(),
      // ルート名と表示するウィジェットのビルド関数を定義
      routes: <String, WidgetBuilder> {
        '/my-page-1': (BuildContext context) => new MyPage1(),
        '/my-page-2': (BuildContext context) => new MyPage2(),
      },
    );
  }
}

class MyPage1 extends StatelessWidget {
  @override
  Widget build(BuildContext context) {
    return Scaffold(
      appBar: AppBar(title: Text('MyPage 1')),
      body: Center(
        child: RaisedButton(
          child: Text('Go to MyPage 2'),
          onPressed: () {
            Navigator.pushNamed(context, '/my-page-2');
          },
        ),
      ),
    );
  }
}

class MyPage2 extends StatelessWidget {
  @override
  Widget build(BuildContext context) {
    return Scaffold(
      appBar: AppBar(title: Text('MyPage 2')),
      body: Center(
        child: RaisedButton(
          child: Text('Back to MyPage 1'),
          onPressed: () {
            Navigator.pop(context);
          },
        ),
      ),
    );
  }
}
都度ルーティング情報を設定して遷移する
事前にルーティング情報を定義しておく場合は、あらかじめビルド関数を定義するので動的にパラメータを渡すことができません。パラメータを渡す場合は、遷移都度ルーティング情報を設定する方法で対応します。
Navigator.push(
    context,
    new MaterialPageRoute<Null>(
    settings: const RouteSettings(name: "/my-page-1"),
    builder: (BuildContext context) => MyPage1(/* 必要なパラメータがあればここで渡す */),
    ),
);
戻る方法は同じです。
import 'package:flutter/material.dart';

void main() => runApp(MyApp());

class MyApp extends StatelessWidget {
  @override
  Widget build(BuildContext context) {
    return MaterialApp(
      theme: ThemeData(primarySwatch: Colors.blue),
      home: MyPage1(),
    );
  }
}

class MyPage1 extends StatelessWidget {
  @override
  Widget build(BuildContext context) {
    return Scaffold(
      appBar: AppBar(title: Text('MyPage 1')),
      body: Center(
        child: RaisedButton(
          child: Text('Go to MyPage 2'),
          onPressed: () {
            Navigator.push(
              context,
              new MaterialPageRoute<Null>(
                settings: const RouteSettings(name: "/my-page-2"),
                builder: (BuildContext context) => MyPage2(/* 必要なパラメータがあればここで渡す */),
              ),
            );
          },
        ),
      ),
    );
  }
}

class MyPage2 extends StatelessWidget {
  @override
  Widget build(BuildContext context) {
    return Scaffold(
      appBar: AppBar(title: Text('MyPage 2')),
      body: Center(
        child: RaisedButton(
          child: Text('Back to MyPage 1'),
          onPressed: () {
            Navigator.pop(context);
          },
        ),
      ),
    );
  }
}
モーダル(全画面ダイアログ)で表示させる
モーダル(全画面ダイアログ)で画面を表示するには MaterialPageRoute で fullscreenDialog: true を指定します。
class MyPage1 extends StatelessWidget {
  @override
  Widget build(BuildContext context) {
    return Scaffold(
      appBar: AppBar(title: Text('MyPage 1')),
      body: Center(
        child: RaisedButton(
          child: Text('Go to MyPage 2'),
          onPressed: () {
            Navigator.push(
              context,
              new MaterialPageRoute<Null>(
                settings: const RouteSettings(name: "/my-page-2"),
                builder: (BuildContext context) => MyPage2(),
                fullscreenDialog: true, // ダイアログで表示するかどうか
              ),
            );
          },
        ),
      ),
    );
  }
}
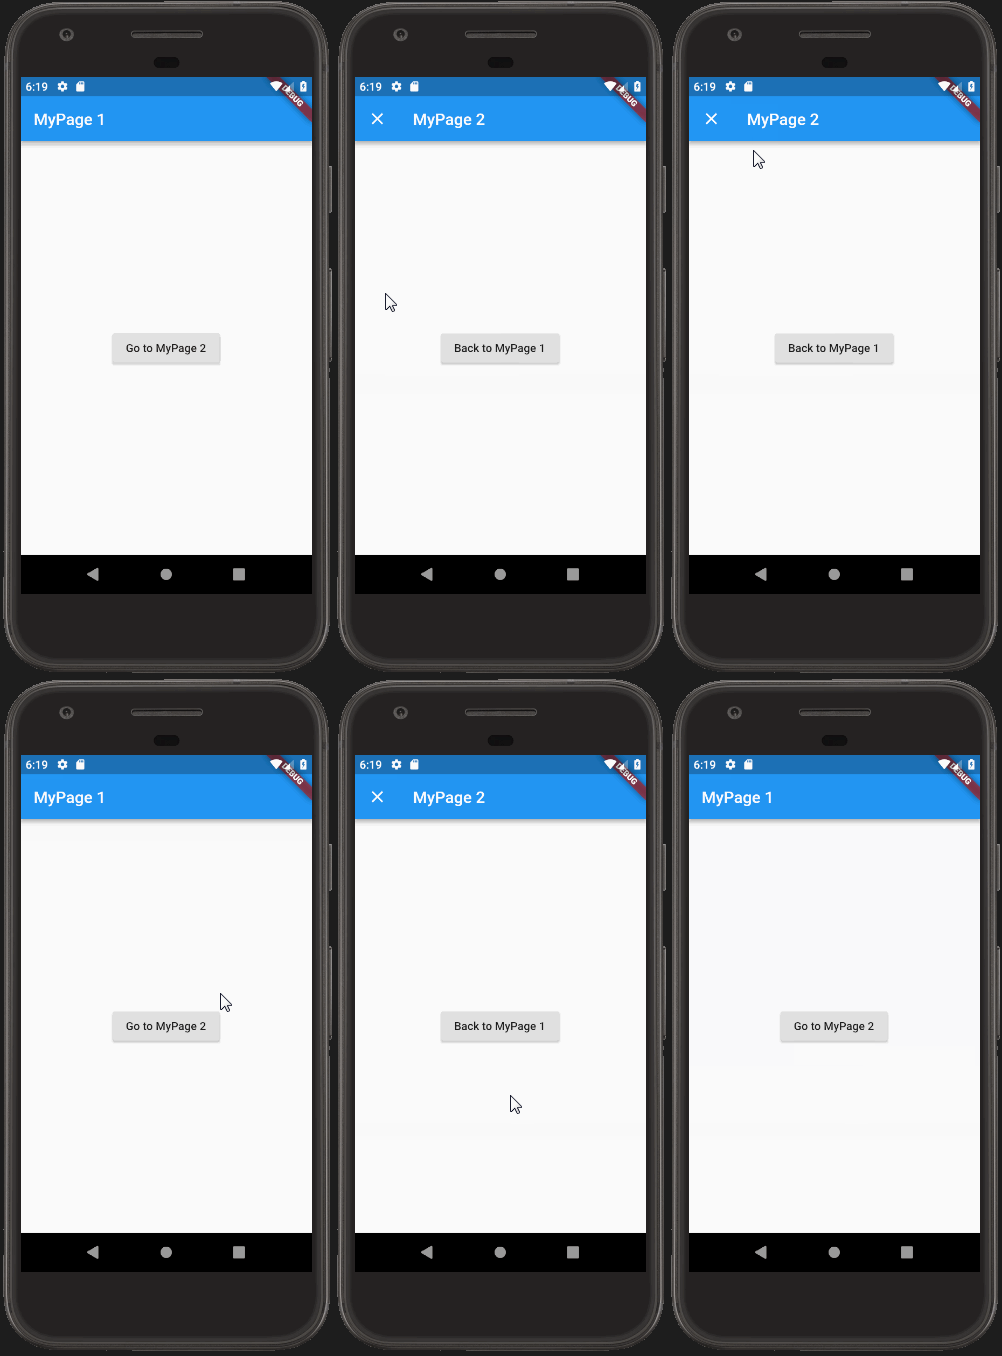
fullscreenDialog を true にすると、モーダルで表示されます。AppBar のアイコンが ← から × に代わっているのがわかります。他に何か違っているのかはわかりません。
以下のような動きになります。
以上。
![[Flutter] 画面遷移とモーダル表示、パラメータの渡し方](https://webbibouroku.com/wp-content/uploads/eye_flatter-730x368.png)





コメントを書く